Stock Up and Save Everything for Baby at Walmart.com!
e.l.f. cosmetics
Showing posts with label serbian cooking. Show all posts

Sunday, August 14, 2016

The Experiment

Happy Sunday, dear readers.

Success! You CAN mix meat and veggies in a pita!


Last night, I decided to try something new. I knew I was gonna make a pita, but I wasn't sure how it would turn out. The reason for this doubt was because I was making pita with both meat and vegetable filling. While meat, vegetable, as well as cheese are common pita fillings, I've never seen meat and vegetable combined in a pita filling before. I had ground beef and spinach, and I wanted to use that for my pita.

Unsure, if anyone else had made a meat and spinach pita, I consulted the oracle known as Google for help finding a recipe. There was nothing in English, and when I searched the Serbian-language net, I did find one recipe for meat and spinach pita from Montenegro. I thank God for giving me the inspiration to watch cooking tutorials in Serbian because even though I've never been particularly proficient in the language, I now could read and follow a recipe in a language other than my dominant English. I looked at the ingredient list and though I had almost all the ingredients the recipe called for, I did not have sour cream. No matter, I would substitute a cup of milk instead.

There was one other novelty I was trying out with this pita. While at the swap meet a few weeks ago, I bought a 10x10 Corningware casserole baking dish with a lid. I'd washed it and was now ready to test it out with my pita. I intended to make the pita on my barbecue after the resounding success of my most recent attempt, but a summer storm blew through and not only put the kaibosh on that plan, but it cooled down the temperature enough to where I could run the oven inside and not turn my home into a furnace.

Using my handy dandy cast iron pan, I browned the meat, onion, and garlic. For spices, I added salt, pepper, a dusting of paprika, and a pinch of turmeric to enhance the flavor of the beef. I added the spinach last, but not before roughly chopping it. In the last pita I made using spinach filling, I didn't alter the spinach and I didn't like the way it lay for the filling. I decided to try the chopped spinach to see how well it lay in the filling. All this went into my mixing bowl filled with milk and beaten eggs.

Assembling the pita itself was actually much easier in this casserole dish than it was in the old recycled aluminum cinnamon roll tin I'd been using previously to bake pitas. The casserole dish is square, and the rectangular fillo dough sheets lay much better in that than in the round aluminum tin. I didn't even need to use that much oil to grease the fillo dough sheets between layers. Sure enough, the chopped spinach lay in the folds of fillo much better than they previously did. It wasn't until after I'd popped the pita into the oven that I realized I forgot to add the baking powder to the filling. To be fair, though, until recently, I had no idea that baking powder was used in pita filling. Growing up, nobody I knew used it. Baking powder helps the fillo dough puff up some, so that the pita isn't so dense.

After baking for about an hour or so until the top was a gorgeous golden brown color, it was time to answer the ultimate question: how did this pita turn out.

A better shot of the fillo and filling


The answer: delicious! The outsides were nice and crispy, the inside was nice and tender, and the filling wasn't too dense either! Having a dairy product in the filling definitely helps. Next time, though, I will add the baking powder. I may or may not use the sour cream too, given how satisfied I was with the milk, but if I get some, I'll use it just to see how it compares. But that casserole dish was a wonderful investment. For $10, I leveled up my pita baking to a whole new level. I don't have to be ghetto about my baking equipment anymore! Also, this pita confirmed that despite being somewhat rare, you CAN mix meat and vegetables in a pita filling, and it will come out tasting delicious.

I've almost gotten my pita making technique down pat. Thank you for bearing with me while I figure out how to make this classic dish from my ancestors.

Thank you for reading this post and please don't forget to share, comment, and subscribe!

Friday, August 5, 2016

Success!

Hello everyone!

I reached a very important milestone yesterday on my journey to becoming a good cook. For the first time, I successfully baked a pita in my bbq! I made a meat pita because thanks to that damned power outage on Monday, the fillo dough and half-pack of ground beef were thawed out and needed to be eaten.

Mekike


I'd spent the morning making mekike, a kind of Serbian fried bread snack similar to a doughnut, using a Serbian-language recipe I borrowed from my favorite Serbian-language Youtube cook, Jelajelena Petrovic. However, I knew that for the pita, I was gonna have to cook it outside because I didn't feel like heating up the kitchen a second time to brown the meat. It took quite a bit longer to brown the meat on the grill than it would on the stove. I think it was my coals because this was the second time I was using them. I normally reuse coals when I barbecue because it stretches the supply of charcoal that I have, and out of a batch, I can usually get two or three grill sessions out of it before they're too spent to be used.

Though it was much better this time around than the last pita I tried baking on the bbq, there were a few minor mishaps with this pita. The first mishap was that I'd forgotten to add a spot of oil to my cast iron pan to fry the onions and garlic before adding the meat. I normally wouldn't forget this, but having one arm full of baby and the other holding my cast iron frying pan filled with meat, garlic, onion, and spices, it completely slipped my mind. Good thing the ground beef I was using was 80/20, so it wasn't too lean and there would be fat runoff from the cooking process.

The second mishap was that I ran out of fillo sheets! I thought I'd have enough, but as it turned out, I didn't. My husband then informed me after I mentioned this that the half-pack of ground beef I'd cooked was two pounds, not one like I thought it was. Now, I know for sure that it's one pound of meat per one roll of fillo dough. My husband didn't mind it, though. He's not crazy about breading.

Finally, the third mishap had to do with the coals. Aside from the low heat level coming off of them when I was browning the meat, they actually went out during the baking process! When I went outside about 20 minutes after setting the pita to bake in the barbecue, I saw that the coals had gone out and so I had to take everything off the grill and light a fresh batch. Once this task was completed and everything was put back on the grill to bake, I'd intended to come back out 20 minutes later to check on the pita.

Except, I fell asleep.

I was feeling tired and thought I'd close my eyes for a few minutes to recharge, and wound up dozing off for an hour or so. When I woke back up and realized how long I'd been asleep, I suddenly remembered that I still had that pita on the bbq! I thought for sure it was gonna be an inedible hunk of charcoal, but to my great relief, I saw the nice golden crust of pita when I took the lid off the grill to have a look.

Taken the next day. Yes, I had to eat some of it. I couldn't resist my creation


While there was a bit of charcoal smoke flavor in the top layers of the pita, the dish actually tasted pretty well. The simple spices of paprika, salt, and pepper all blended nicely with the flavor of the fillo dough. It actually didn't come out that greasy either, despite my accidentally pouring glops of oil on the fillo and the bottom wasn't terribly burned either. It was nice and crispy on the outside while tender on the inside, like a good pita should be.

My meat pita from the inside. I ran out of fillo dough and basically did a giant meat dump on the last layer before covering it. It still tasted good, though.


Despite the few mishaps, I was so happy that my pita came out so well. Now, I can try baking something else. My family and I went to the swap meet tonight and I bought a small square casserole baking dish that was sorely needed (I was hoping to find a 9x13 baking dish, but no one had it. I did notice an awful lot of small crockpots, though). I think maybe I'll make lasagna next. My husband would like that, though I'm not sure how to get past the cheese hurdle(I don't like ricotta cheese and he can't eat melted cheese). Time to do a little research on this...

Thank you for reading this post and please don't forget to share, comment, and subscribe!

Thursday, June 30, 2016

The Pita

Hello, dear readers!

Today, I was feeling ambitious. I decided to try out my bbq as an oven by making some pita.

I got the idea for tonight's dish from a Serbian-language cooking tutorial I saw from my favorite Youtube grandmother, Jelajelena Petrovic, called "Pita sa Spinacem" (Spinach pita). I knew when I watched her video that I had to try making this, but I hesitated because my husband views cheese as though it's the spawn of Satan. After I asked him whether or not he'd eat a spinach pita if I made one, knowing that it had cheese in it (I resolved to use feta, since it was the closest to what I observed the Serbian cheese used in the video to be) and receiving an answer in the affirmative, I then set about procuring the ingredients I'd need. The one conniption I had was whether we had suitable bakeware for the pita, but after digging around in the cabinet where we keep the pots and pans, I found an aluminum pie pan which originally housed a tray of cinnamon rolls from the store. My husband had saved up a few of those to reuse, and it was big enough to fit on the grill.

Baking the pita on my grill


Thank goodness it rained this afternoon, so the ground was nice and wet. I cleaned out the old crappy coals from the barbecue and after putting in a few fresh ones, I decided to light them using some paper towels soaked in cooking oil thanks to another Youtube tutorial I saw (I refuse to use lighter fluid because then the food tastes like it). It took a few sheets to get the coals going, but I finally got them lit. My husband was whining at me to use the propane stove, but I refused because I didn't want to burn myself during the transfer.

Unfortunately, I didn't take pix of the process because the baby was being exceptionally clingy and was throwing a crying tantrum because my making the filling and assembling the pita meant that I couldn't pick her up and hold her like she wanted me to. I was able to hold her while I fried the onions, garlic and spinach over the hot coals, but once the pita was assembled and on the grill, she went and nursed herself to sleep. Her tantrum had worn her out.

Pitas, as I alluded to in an earlier post, are classic Serbian food and generally don't require much in the way of effort to make. It's an ideal quick-n-dirty meal that can be thrown together in about an hour or so to feed a hungry family or party guests. I wasn't sure how it would taste, given that the coals are made of wood and tend to impart their flavor onto foods, but I was happy to give it a try since I was trying to avoid using the oven at all costs. After I put the pita on the grill to cook, I realized later that I'd forgotten to add milk to the filling. This minor error proved to be providential because as fate and the fickle monsoon weather would have it, another storm blew in and I had to cut the bbq baking time short so that I could take the pita inside. The milk in the filling would have made the fillo dough soggy and rendered it inedible at that stage.

My grandmother would call this "dead"


Despite being undercooked, the pita was cooked enough to the point where you wouldn't get food poisoning from eating it. And actually, it wasn't bad! Only the top layers of the fillo dough carried any hint of charcoal flavoring from the grill, but it wasn't bad. It blended nicely with the rest of the ingredients. When my husband woke up from his nap, he saw the dead pita and finished it off in the oven's broiler. Ironically, he rendered the feta cheese inedible to his standards when he did that because while the top was golden brown, the cheese melted and set off his gag reflex. I was disappointed because now it meant that he wouldn't eat my pita. My husband was also disappointed because he liked the taste, but he couldn't eat melted cheese cuz the texture triggers an adverse reaction in his throat (I think he's allergic to cheese, but it only happens when the cheese is cooked). We'll see about breakfast, after everything is nice and solid.

After a quick stint in the broiler. Much better

Would I do this again? Yes. I have another roll of fillo dough set aside for this purpose. Next time, however, if I can't use more spinach, I'll use half as much feta cheese. I'll also remember to add the milk to the filling, but I think the spinach could stand to have a good chopping so that it would fit easier in the folds of the dough. Also, I'll figure out a way to get the grill to light hotter so that my pita will bake properly. Despite the storm throwing off my timing, I'm genuinely pleased with how this came out. It was much better than my burek.

Thank you for reading this post and please don't forget to share, comment, and subscribe!

Wednesday, May 25, 2016

Adventures in Serbian Cooking

Greetings!

For the last few days, I've been binge watching Serbian-language cooking videos on Youtube. I've had a serious cooking bug burrowing its way through my consciousness, and so I consulted the bakas (grandmas) of Youtube for some ideas on what to make.

Since its only gonna be in the 80s this week, I thought about baking something. It will either be bread or burek. While my husband isn't much of a bread eater, I am. There is one grandmotherly Youtuber whose bread recipes caught my fancy. She calls herself Jelajelena Petrovic and her way of making breads and rolls seemed pretty easy and straightforward. They look absolutely delicious, as is evidenced in the video below.


Since I'm going off of a Serbian cooking video, whats gonna come out of my attempts will vary from the product shown. For one, I may not be able to get all the ingredients she uses in her videos (I don't remember if the Euro mart stocks Serbian cheeses/Bulgarian feta cheese or Vegeta (a common seasoning mix used in Serbian cooking)). Also, the ingredients are measured out according to European specs, where mass is used to measure out ingredients as opposed to volume, which is the American standard. My husband advised me to invest in a kitchen scale for this sort of endeavor, but we can't afford one right now. Thank goodness Google can do conversions for me.

One thing I was pleased to see was how much I understood and could follow along with the videos. I've never been particularly proficient in Serbian, but I remembered the words for ingredients like flour (brasno) and procedural steps like baking (pece). Some words I've never heard before but figured out, like black pepper (bibera) and yolk (zumance). For the words I didn't know, there was a plethora of online Serbian-English dictionaries to be found on Google.

This weekend, I will give one of Jelajelena's recipes a try. I'm looking forward to it!

Thank you for reading this post and please don't forget to share, comment, and subscribe!

Friday, May 6, 2016

The Palacinke

Greetings!

I hope you all had a safe and happy Cinco de Drinko yesterday. Yes, I know it's actually Cinco de Mayo, but what was originally a minor Mexican holiday celebrated locally in the city of Puebla where the famous battle took place, has been co-opted blown up into an event for the express purpose of pushing cheap, crappy booze here in the US. This is why I call it Cinco de Drinko. It's like a boozy version of President's Day.

Everyone's Mexican for a day on Cinco de Drinko!


While the rest of the nation made fools of themselves getting wasted on Mexican food and margaritas, I decided to try out my grandmother's recipe for palacinke (pron. pa-lah-cheen-keh). Palacinke are kind of like flat pancakes, very similar to crepes. I hesitate to use the word "crepes" as an analogy because to me, palacinke have more char to them than the light-colored crepes. This could just be because of the way my grandmother made them, as hers always had some char to them (she considered light colored palacinke to be underdone).

In a major departure from my usual protocol, I actually followed the recipe as it was given to me! I suppose this was probably because I was making it for the first time, and I didn't want the batter to come out too thick (palacinke batter is thin). I had tried making palacinke on my own in the past from memory, but they never seemed to come out quite like how I remembered them. Maybe now, I had a chance!

After combining the ingredients, I pulled out one of the cast iron skillets. My grandmother makes her palacinke using a Teflon-coated skillet, but since we don't have one anymore (the one Teflon skillet we had was used until the Teflon literally started disintegrating off the surface of the pan!), all I had to work with was cast iron.

The first palacinka


My husband likes to say that the use of cast iron cookware is a verifiable demonstration of one's cooking skills. Despite some recent successes in the kitchen of late, on this family recipe I failed miserably. Even though I poured some oil into the skillet, the rough surface caused the batter to adhere to the bottom of the skillet and thereby completely destroy the palacinka (singular version of palacinke). Even after I changed skillets to the smaller, enamel covered iron skillet that I usually use for frying eggs, I just could not get the resulting palacinke to stay together or fry to the point where it was cooked, but not crispy (properly done, palacinke are flexible enough to roll up). I changed the heat levels, the amount of oil and batter in the pan, and I just could not get them to come out the way my grandma made them. If they stayed together, they were hard and crispy, not soft and flexible like how she made them.

It would start out like this in the skillet...

...And then turn into this crumbly mess every time I tried to flip it!


Despite this disappointing first batch of palacinke, they were as tasty as I remembered. They tasted lovely with some raspberry jam. My husband was quite pleased with them, and encouraged me to try making them again. I suppose cast iron is not the most optimal cookware for making palacinke, but until I can find a small Teflon pan, this is all I have to work with. Maybe it is a matter of finding the right heat settings or oil-to-batter ratio. My grandma wasn't specific on what level of heat she used, but she does have a gas stove (ours is electric) in addition to the cookware differences. This will make for an interesting journey-the quest for the perfect palacinka!

Thank you for reading this post and please don't forget to share, comment, and subscribe!

Tuesday, April 26, 2016

The Burek

Happy Monday, dear readers! I hope your weekend went well.

Recently, I decided to call upon my Serbian roots and make some traditional food. The fillo dough I bought at the Euro mart a few weeks ago was sitting in my freezer and needed to be utilized. When she was here, my grandma gave me her recipe for making cheese pita, a kind of savory pie that is a staple of Serbian cuisine. Though she always made her dough from scratch, her advanced age had caught up with her and my grandmother was now using fillo dough to make her pitas.

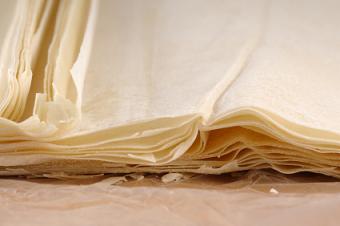
Fillo dough, out of the box. It's supposed to be available in major grocery store chains, but I have yet to find them outside of the Euro mart here. Pic found here 


Though I understood her reason and rationale for doing so, this admission saddened me because my grandmother's pitas were always doughy and thick, which was what I came to understand pita as being (though to make things especially confusing, pita can be made with thick or thin dough and that pita, gibanica, and burek are all mostly interchangeable terms to describe savory pies in Balkan cuisine). However, when she made burek, that was the only time she used fillo dough for something that wasn't a pastry.

Burek, like pita, is a savory pie from the Balkans. Just about every country and dialect there has a name for burek, and it is usually filled with cheeses or meats (though vegetables like spinach are common). Burek can be rectangular, round, horseshoe, or spiral shaped (the latter is common in Bosnia). It is usually made with dough stretched thin that can be either handmade or from fillo.

This is how I remember burek from my childhood. If fillo dough is not used, then the dough is handmade and stretched very thin over a large surface area and folded over with the fillings. Pic found here


Since my husband positively despises cheese, I decided to make meat burek. I remembered there was a Serbian deli a few towns over from where I grew up in the Chicago suburbs, and to this day I remembered how good the owner made his meat burek. He used ground beef seasoned with a little salt, pepper, and a pinch of paprika. I don't remember if he used anything other than beef, but the taste has remained burned in my memory all these years. This would be a good way to use up my fillo dough.

After I let it thaw in the fridge for a day or so, I took out the fillo dough along with some canola oil, and a pastry brush. When making these pies, it is essential that the dough be greased with each layer.

I started off by cooking the meat filling first. We had a leftover pound or so of ground beef that needed to be eaten, and I added in my customary chopped onion and garlic for flavoring. I then added some salt, pepper, and a touch of paprika.

Filling in progress


When the meat was finished, I turned on the oven and as it warmed up, I set about assembling the burek. I had no clue how fragile fillo dough was until I began unraveling its sheets from the roll and layering them in the pan. The sheets were tearing and literally disintegrating in my hands, no matter how carefully I picked them up. My grandmother and mom made handling them look so easy! HOW?!

After oiling each sheet and before laying the next one down, I added my meat filling after every few layers. With the fillo dough fast becoming dry, I finished off the package by just throwing on the last few sheets, oiling them up and putting them in the oven. My grandmother's baking instructions were just to let the pita (or burek, in my case) bake at 350 until golden brown, which I figured wouldn't take that long.

FINALLY assembled and ready to bake!


Despite me periodically opening the oven to check on the burek (our oven does not have a light), it took almost an hour and a half before the top looked even halfway tan, but as I would discover when I cut the burek to eat, I had overcooked it. The bottom was kinda burned, the middle layers were alright, but the top layers were dry and the whole thing was quite greasy from all the oil I'd slathered the fillo sheets with. Despite the amount of meat I made, I felt like I hadn't used enough for this dish to turn out as good as I remember it being.

Finished

My first burek. Needs more meat and less time in the oven


Even though I was disappointed by the way this burek turned out, it was a learning experience in a number of ways. Fillo dough is fragile and dries out very quickly, so I have to figure out an easy way to keep the layers moist and if there is a way of handling the sheets so that they don't disintegrate as I'm handling them. I could also take a stab at making the dough from scratch, although my counter is tiny and I may have to get creative about space. Also, I feel like my dough to meat proportions were off and that the next time I make burek, I'll see how well 2 lbs of ground beef works with a package of fillo dough. I'll also use a different pan next time to see if the kind of pan I bake with has an effect on how the burek turns out.

It may take a while and a few bombed bureks before I finally get it right, but for better or worse, I don't give up. To make a good burek is an art, one that I aim to achieve.

Thank you for reading this post and please don't forget to share, comment, and subscribe!

Thursday, July 30, 2015

Barbeque Queen

Before I got married, I was not much in the way of a cook.

In fact, I'm still not much in the way of a cook.

When it comes to making food, my wonderful and amazing husband does the cooking. And he likes doing it. In his family, it was a tradition that the men learn how to cook. And it was a good thing, since I would have missed out on lots of good down-home Cajun cooking that his family made.

But, there is one wifely cooking task I'm proud to own.

Barbeque.

I didn't think I could cook anything outside of a microwave and boxed food, until my husband taught me how to barbeque. It all started when I had a craving for carne asada. Living here in southern Arizona, carne asada is a popular weekend dish. Many a Sunday, I can smell my neighbors cooking carne asada. So naturally, I wanted to make some.

Since I don't have a family recipe for carne asada, nor do I speak enough Spanish for one of my neighbors to teach me how to make it, I consulted the great oracle known as Google for some recipes on how to make it. Then, when our food stamps came in, we got some chuck steaks on sale and I made the marinate. I chose a citrusy sort of marinate, since we had all the ingredients on hand.

After an overnight soak in the marinate, my husband fired up the grill and I plopped the marinated steaks along with some green onions and peppers. The result was delicious.

Tools of the trade

Smoky, meaty goodness


I felt good about it afterwards since I was the one who created this treat from beginning to end, and that despite my huge lack of experience, I could barbeque something and NOT have it come out vulcanized! A huge confidence boost for someone like me who grew up with shoe-leather tough barbeque!

The next barbeque endeavor I undertook was pork chops, using a marinate similar to one my late father-in-law used for his homemade barbeque sauce. I don't have pictures of that one, but it was also delicious.

Finally on 4th of July, the biggest grilling day of the year, I barbequed chicken and americanized cevapcici (Serbian sausages made traditionally with ground beef, lamb, and pork with spices. Instead of lamb and pork, I'd made the cevapcici with ground beef and Jimmy Dean-knockoff sausage cuz it was there and needed eating)

Those pink finger-looking thingies are the cevapcici


One thing I've discovered when cooking chicken quarters whole-the joint where the thigh meets the drumstick does not cook all the way, even if the rest of the chicken does. Not wanting to vulcanize the rest of the quarter to ensure that part cooks through, next time I feel like barbequing chicken, I'll separate the thigh from the drumstick for more even cooking. Hope my husband remembers where he put the skillsaw...

In due course, I will be sharing my favorite marinates, as well as tips on barbequing in general.

Bon appetite!